
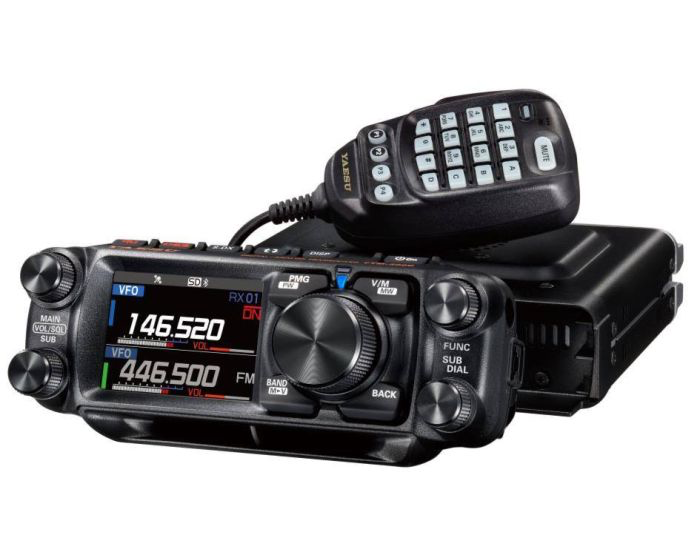
Yaesu FTM-500DR
About a year ago, I installed my old Yaesu FT-2500 in the car. It wasn’t exactly permanently installed, but it was good enough at the time without much effort. The FT-2500 is a mono band 2-meter transceiver which is quite old. Mine still works perfectly.


I had been looking for an upgrade for quite awhile, and mobile transceivers which had a detachable head were the style I was most interested in. This is because I don’t have any dash room at all for a radio, and even if I did, I don’t want to hack up the dash to add anything. My current install required the center console lid to be open all the time and I had to look far down away from the road to see the display.
With a detachable head, I can keep the body in the center console or under a seat tucked away. The head can then be placed onto a cup holder mount or clipped onto a windshield mount or vent mount.
There are quite a few makes and models with detachable heads to choose from. Next on my must have list of features in a mobile rig was to find a model with the microphone connector on the head. This eliminates the need to run another wire for the microphone from the front all the way back to where the body is. If I tuck the body under the seat or in the center console, the mic would need to be routed out with a long enough cable to reach.
The next feature I was waiting for was a speaker on the head. If the body of the rig were tucked away, I would need to add an external speaker and run the speaker wire up to the front somewhere where I can mount a speaker. Although many rigs have Bluetooth, I don’t have interest in using the Bluetooth in the vehicle for a transceiver.
Last on my list of features is APRS. I have been experimenting with APRS on my FT5D and having quick access to location, weather, and Winlink for example are convenient.
The FTM-500DR
When Yaesu announced the FTM-500DR, I didn’t pay much attention until I heard it had a speaker in the head. It happens to use a front firing speaker in the head combined with a speaker on top of the body for enhanced audio detail. Further, the microphone can plug into the head or the body. Lastly, it also has APRS.
Very rarely does something new end up addressing so many items on my list of must-haves.
DC Power Requirement
The specs on the FTM-500DR note the maximum power draw is 12 amps at 13.8 volts. My power outlets in the car are 180 watts maximum, which at 13.8 volts equates to 13 amps maximum. The radio would in theory work under this limit. Also, the radio can’t draw more than 15 amps due to the fuses included on the radio’s DC power cable.
Connecting the radio to a power outlet and not directly to the battery is not best practice. However, this is temporary and I will eventually run a DC supply cable from the battery directly to the radio.
Body Location
I chose to mount the body of the radio inside the trunk, in a cabin area. There happens to be a DC power outlet right there, which provides a convenient connection for power. Further, my coax run from the mag mount dual band antenna runs right down to that area in the trunk. This allows for the shortest run of coax possible.
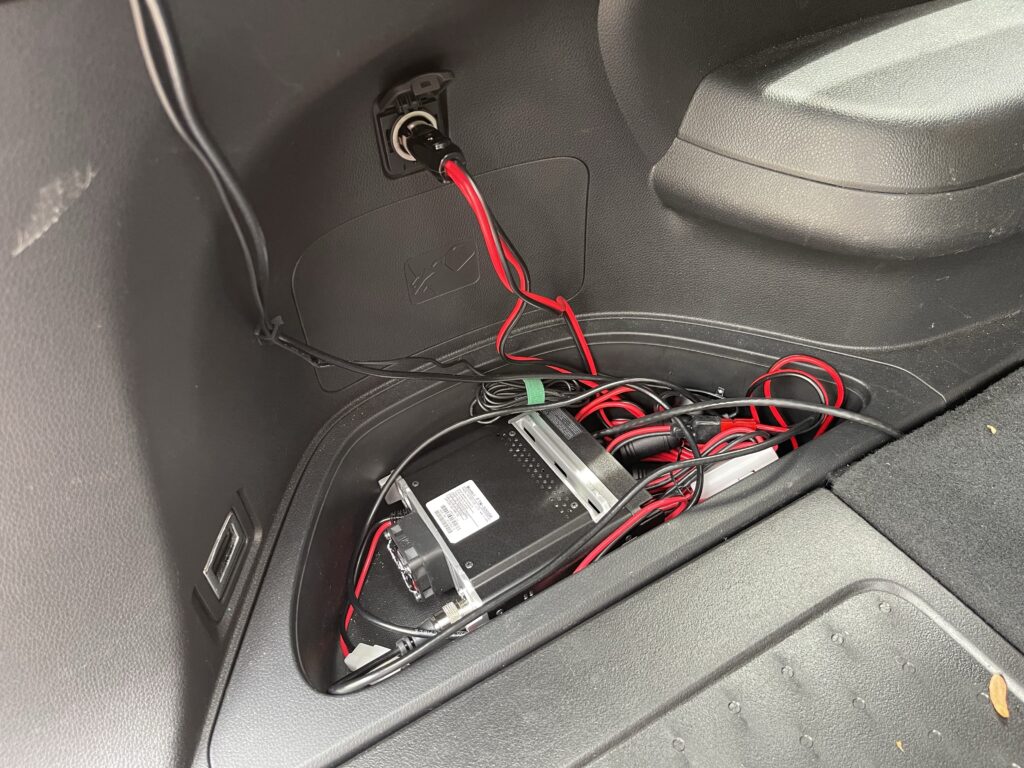
The body of the FTM-500DR fit perfectly in a pocket in the trunk near the power outlet. I added some velcro to hold it in place for now.
I have a PowerPole connection on the rig and another on the DC connection to the power outlet. I use the PowerPole connectors so that I can disconnect from the vehicle power and plug into my LiFePO4 battery box when operating with the vehicle off.
Remote Head Extension Cable
Because I mounted the body of the transceiver in the trunk, I need at least 8 feet or so of cable to run from the body to the head, which is to be mounted in a cup holder mount.
The transceiver came with a very short cable which is intended for keeping the head mounted to the body. If you wish to detach the head and mount the body elsewhere, you will need a longer cable.
Yaesu does make a remote extension cable. However, the price was a bit steep for what it is. As it turns out, the short cable that came with the rig is a standard RJ45 pin out.
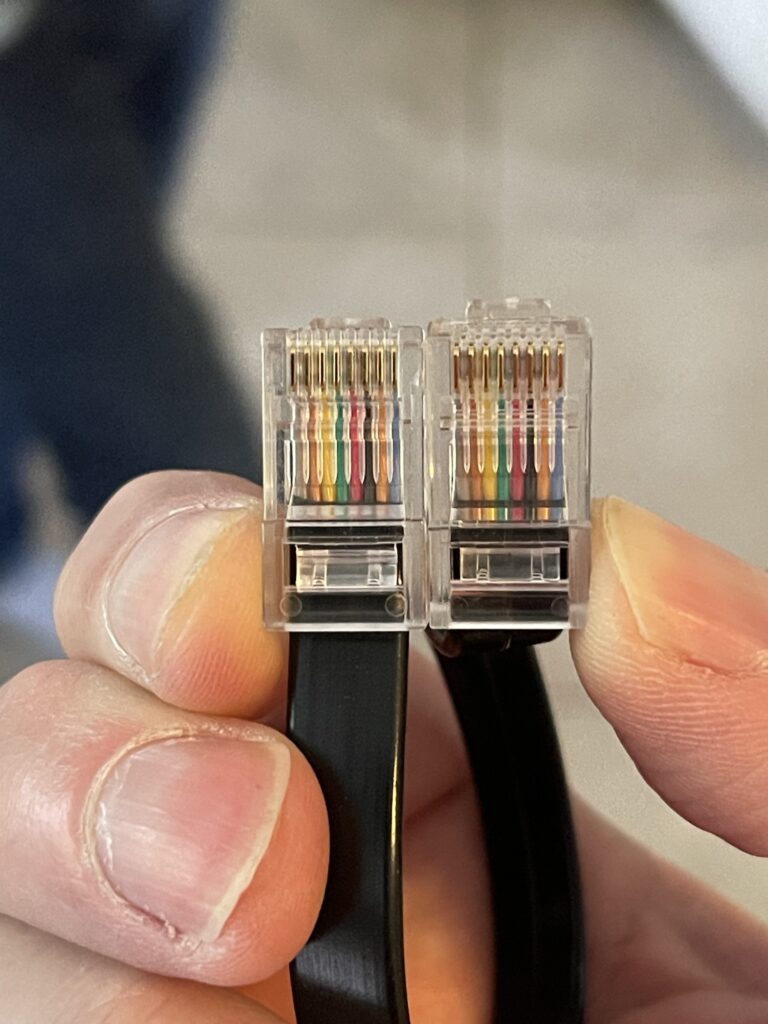
I inspected the pin out of the short connection cable that came with the transceiver. It appeared to be a direct pin out and no pins reversed. In theory, a standard Ethernet patch cable would work.
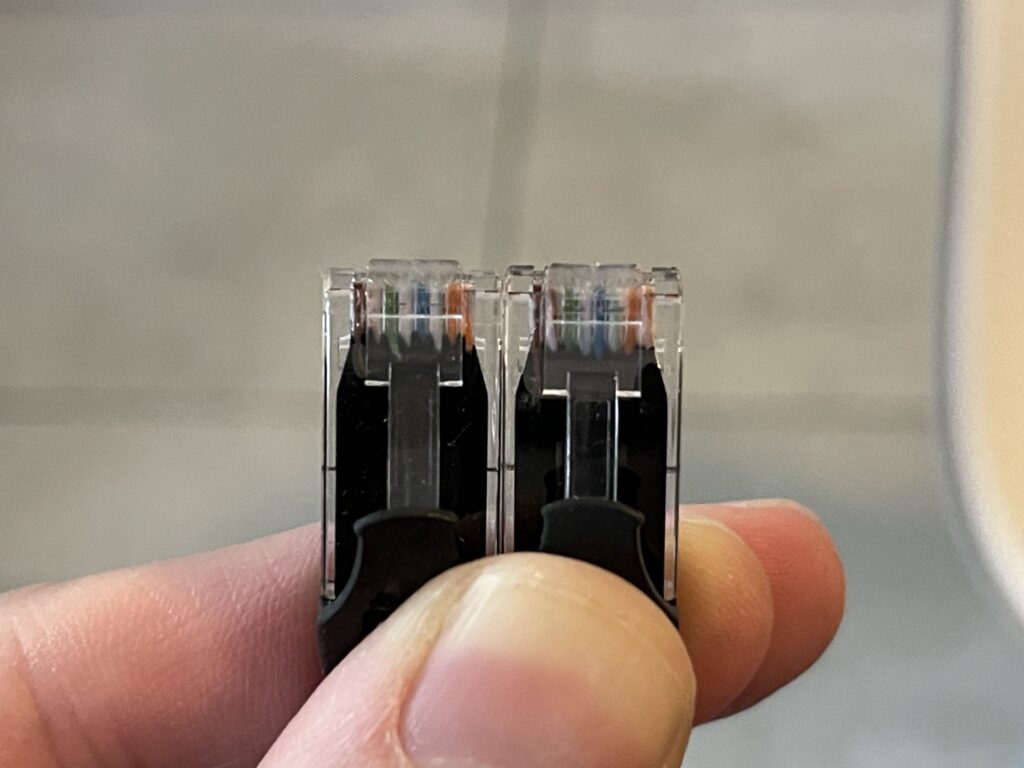
I inspected a standard Ethernet patch cable and it also appeared to have a direct pin out without any pins reversed.
Ethernet Cable as Remote Head Extension
I tried a 12 foot high quality Ethernet cable between the body and the head and it worked! I now have an inexpensive cable to run from the trunk to the front of the car. This was very easy to route underneath the seats, and underneath the trim all the way to the front.
Head Mount
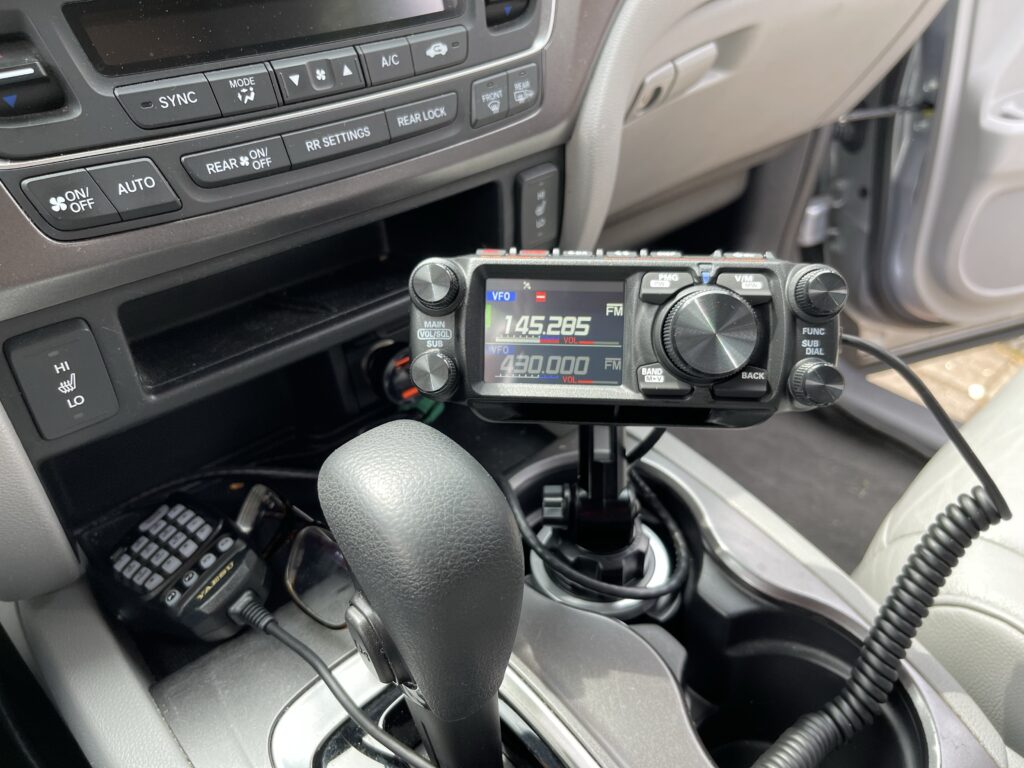
I mounted the head to a Lido cup holder mount. It was made for the FTM-300/400/891 but fits this radio perfectly.
The only complaint I have about the mount is that it shakes a bit when pressing buttons. I suppose any plastic mount will do this.
Setup and Customization
The first configuration items I changed were settings related to the AESS options because the body of the rig is far back in the trunk. The front firing speaker in the head is clear and loud enough to be the only speaker for the rig. I disabled the rear speaker and tone options for the front speaker. This means that I am not using any part of the AESS feature.
Since APRS is an important feature for me and I will be using it often, I added the APRS beacon setting to the CFL (custom function list) and message/station list to the custom function buttons on the hand mic. This allows me to disable or enable APRS beaconing easily and to be able to view messages and stations easily.
The rig supports an SD Card for backup and restore of the programming as well as GPS logging and voice recording. My hope is soon there will be programming software available which I can use with the SD card for easier and faster programming.
Updates
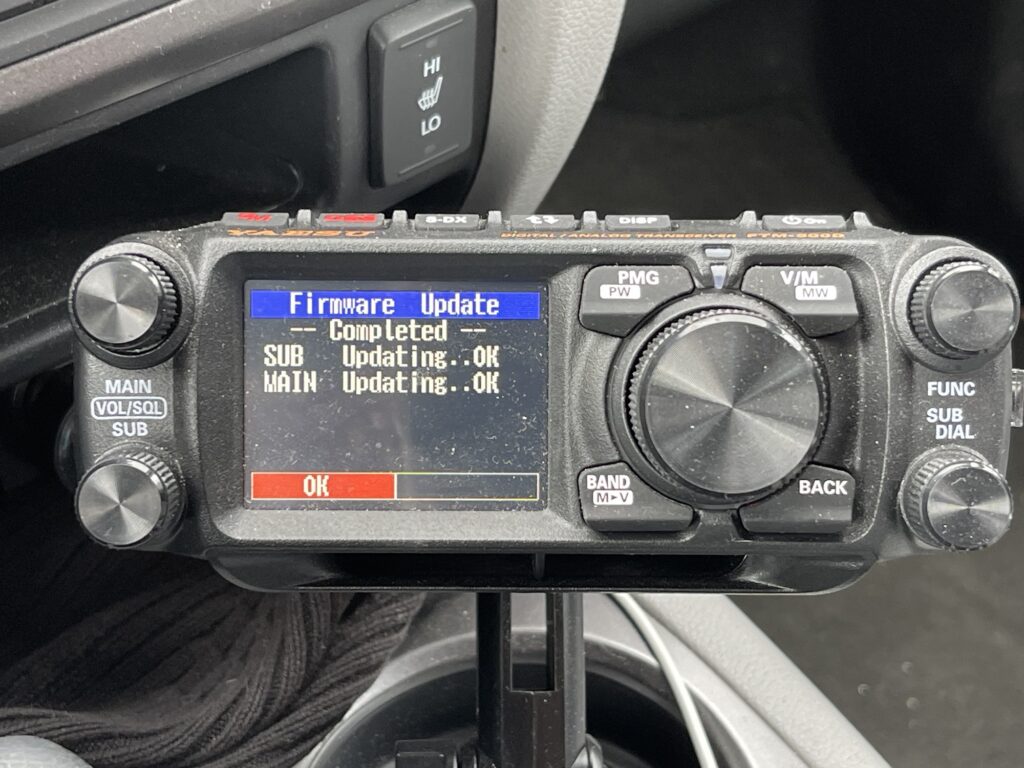
Since my original post, Yaesu have released ADMS programming software for this transceiver. The software is available for free and it works with either a programming cable or an SD card.
I am impressed that Yaesu released this as it ads to the overall value of the transceiver. I had been checking often to see if and when Chirp software would be compatible with this radio.
A firmware update is required in order to use the programming software, which adds clone in / out support in the menu.
Final Thoughts
The FTM-500DR is an excellent release by Yaesu for its front firing speaker in the head, as well as the microphone connection option on the head. This design is currently unique and makes it easy to install and operate.
I’ve used the radio only for a few days, but the first thing I noticed with the radio was the clear audio from the front firing speaker in the head. I wrote an article comparing the FT-991A top firing speaker to an external front firing speaker. The clarity and audio quality of a transceiver is one of the most important aspects to the usability of the radio in my opinion. The speaker in the head on the FTM-500DR is 6 watts, which provides clear and loud audio if needed. I disabled the speaker in the body as it is located in the trunk. There is an equalizer setting you can use to adjust to your preference.
This is a big improvement over the FT-2500 I had temporarily installed in the center console. I haven’t had anything close to a mobile rig this accessible in a mobile installation.