


LiFePO4 Battery Monitor
I have always had backup batteries of one form or another, usually lead acid or AGM. Recently I started experimenting with LiFePO4 batteries. Lithium batteries tend to have a fairly predictable storage capacity during their lifetime of service. Unlike lead acid batteries, lithium batteries are designed to be discharged almost completely if needed. If this were done to a regular (non deep cycle) lead acid battery, irreversible damage can occur.
Since lithium batteries are designed to be discharged almost completely if needed, this makes them ideal for powering a load independently. In other words, unlike a lead acid battery which is intended for short bursts of power or short periods of power then immediate recharge, lithium batteries can power a load until they are nearly completely discharged. This makes them ideal for powering your shack should mains power be unavailable, or for portable use for example.
When we use lithium batteries, we often run them completely down. A monitor which can show the percentage of charge remaining is useful when using batteries in this way. Further, being able to see how far from a full charge the battery is when recharging is helpful.
Most large rechargeable batteries do not come with a monitor which indicates the charge remaining. If you wish to monitor the state of the battery, you will need to purchase a device to do this.
There are many battery monitors available at various price points. Your battery type and what you wish to monitor will help narrow down the choices. In my case, I wanted to monitor the remaining charge of a LiFePO4 battery.
Voltage Sampler or Coulometer
The two most common types of battery monitors are either voltage samplers or coulometers. You can determine the type of a battery monitor by the method in which it is wired with the battery. If there are just two wires (positive and negative leads) from the monitor to the battery, then it is a voltage sampler.
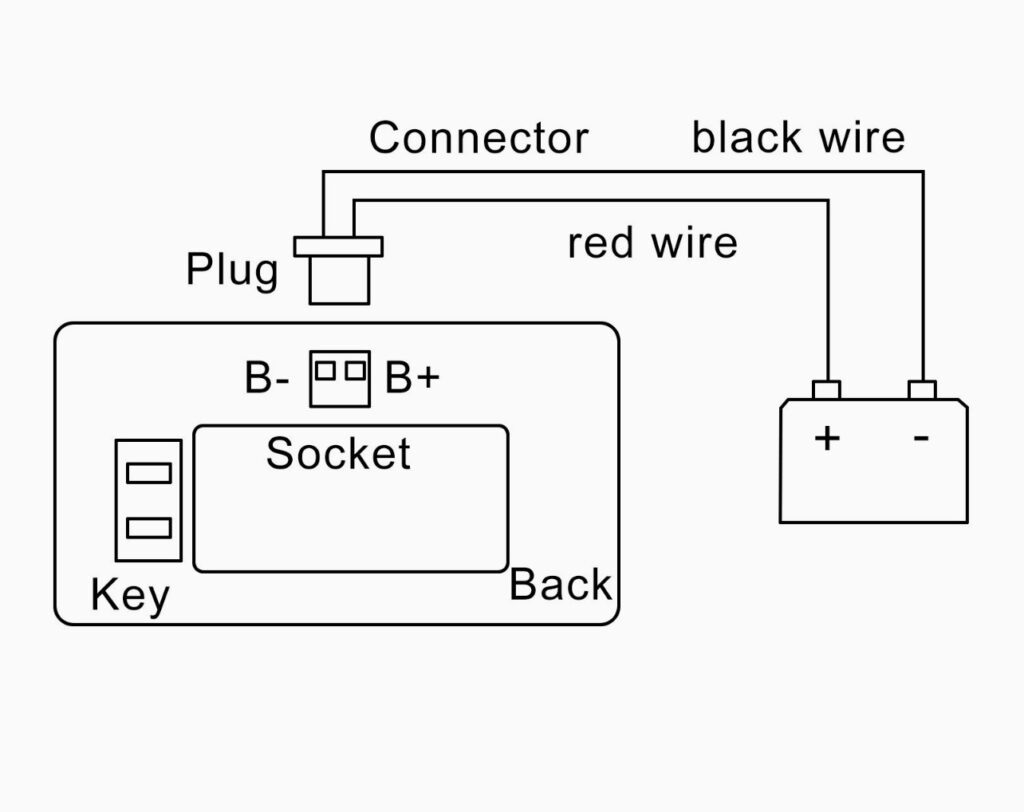
In the image above, you will notice there is a direct connection from the battery monitor to the battery’s positive and negative terminals. This type of monitor is a voltage sampler. These work well for batteries for which the voltage drops predictably as the battery discharges.
If the battery monitor uses a “shunt” or bar between the battery and the load, then it is likely a coulometer. It will also have a lead for powering the device and possibly sampling voltage in addition to monitoring current flow across the shunt.
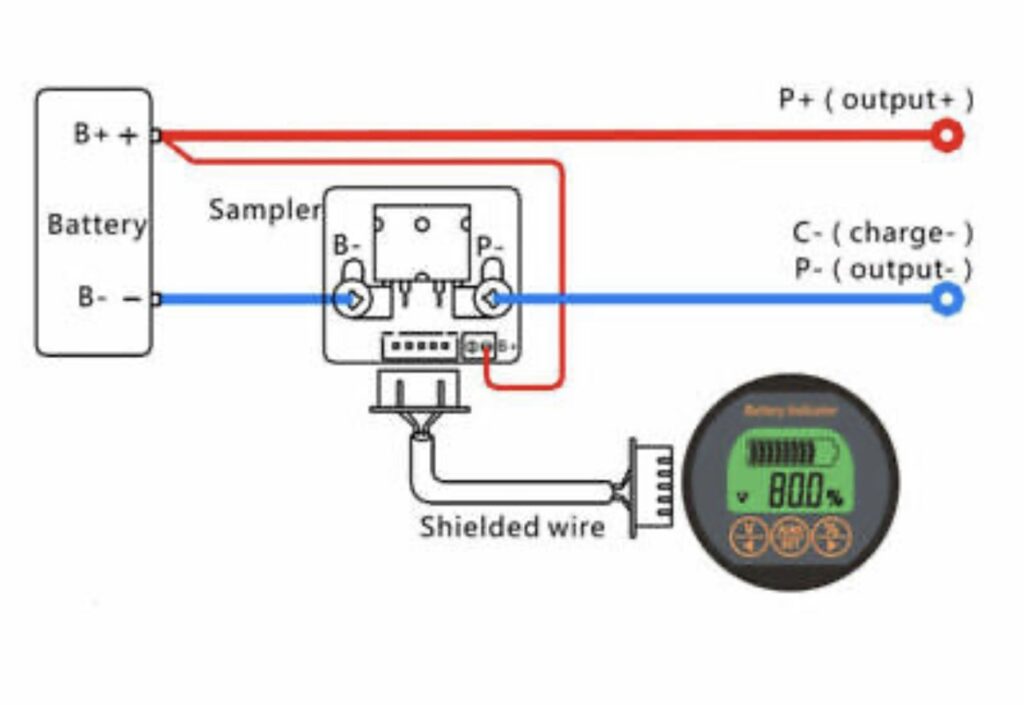
In the image above, you will notice the negative lead of the battery passes through the shunt. This allows the battery monitor to measure the current flowing in either direction, in addition to the voltage.
LiFePO4 batteries provide a more constant voltage from a full charge to the point at which the BMS (battery management system) low voltage cutoff kicks in when the battery capacity is consumed (when compared to lead acid or AGM). Therefore, using a voltage measurement to determine the remaining charge of a LiFePO4 battery isn’t the most accurate method since these batteries are designed to have a nearly constant voltage to the end of the discharge cycle.
The most accurate method for monitoring remaining charge of a LiFePO4 battery is a coulometer, or a device that measures electric current flowing in both directions. For example, if a device measured the total charge that a battery took in during a recharge cycle, it can then use that as a baseline for its charge capacity. It can then monitor the reverse charge flowing out of the battery to determine the remaining amount of charge.
Battery Monitor Features
Knowing the type of battery monitor you need is the most important factor. Other factors such as what the monitor displays, the size of the screen, whether it has memory to store the measured capacity of the battery, Bluetooth connectivity, low battery/voltage alarm, or other extra features are secondary.
At a minimum I wanted a device that would remember the battery capacity in case I were to completely discharge the battery. Since the battery monitor is usually powered by the battery itself, the monitor would not have power when the BMS cuts off the output at the low voltage cutoff point. Of course some monitors support an external power supply for the device, but the memory is a great feature to have.
At this point I decided the extra features such as Bluetooth, low voltage alarms, and other features were not necessary, as this battery monitor is used on my solar backup for the shack. I do not plan to run on battery and solar normally.
I chose to test out the QWORK battery monitor, which is on the inexpensive range of options available. This model shows the battery voltage, percent charge remaining, current draw and direction (charge or discharge).

Wiring
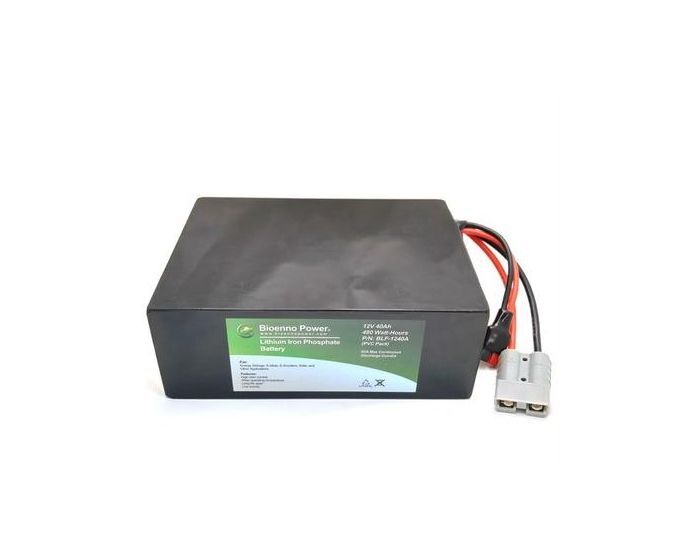
The first battery I decided to connect to this battery monitor was a Bioenno 40 Ah 12 volt battery. It has 2 Powerpole connectors: an SB-120 which is the larger connector and the smaller more familiar PP45 connector. Both are connected to the BMS in the battery in parallel, so the load and charger can be connected to either one.
This is a great option which allows the charger to be connected at the same time a load is connected.
Since I chose a type of battery monitor that needs to be wired between the battery and the load, I wired up something that can be moved to different batteries if needed.
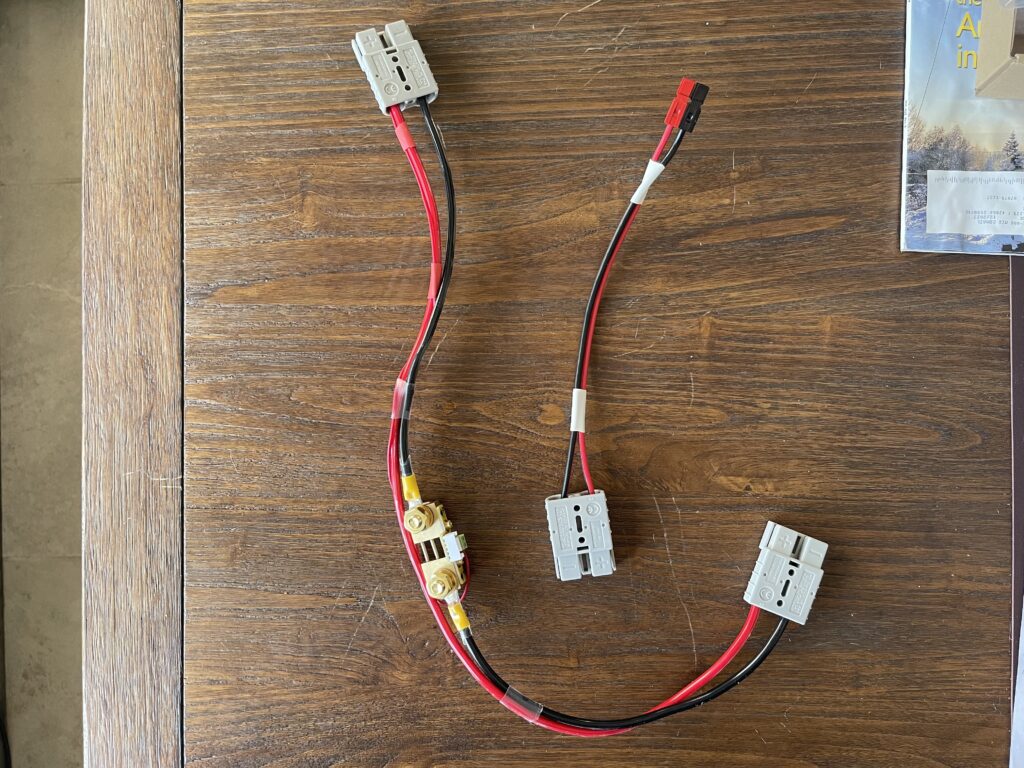
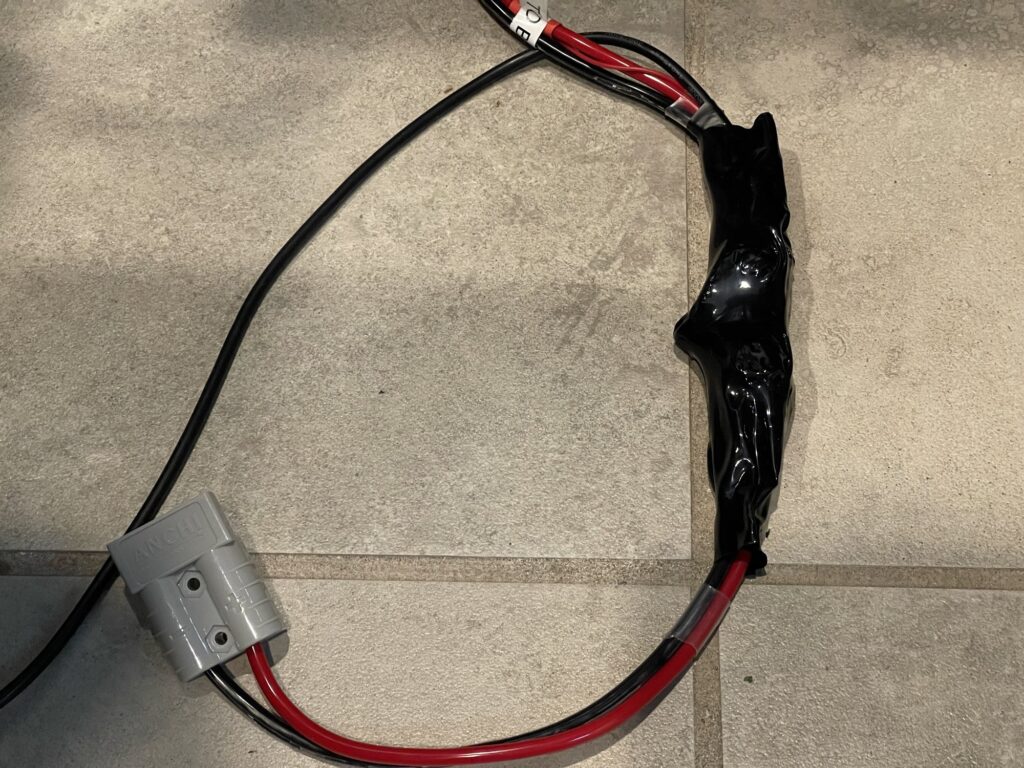
All current needs to pass through the shunt (the brass block in the picture above with the bolts on each end) in order for the battery monitor to track the current flowing in either direction (charging or discharging). I wired up the shunt with SB-120s (the larger connector) so that it can be used with higher current batteries in the future. The shunt handles up to 100 amps. I built this cable assembly with parts I had on hand from various other projects, such as the SB-120s, the 10 AWG wire, the ring terminals, crimpers, etc.
One side of the shunt is labelled “B” for battery and the other “P” for load. One SB-120 connects to the battery, the other to the load (or charger). Then, there is a small connector on the shunt for the sampling voltage and to power the battery monitor, which is tapped from the positive lead on the battery side. I ran a small gauge red wire from the positive on the battery side of the cable assembly over to the terminal for the sampling voltage. Lastly, the battery monitor connects with a length of shielded wire from the white connector in the center of the shunt to the back of the battery monitor.
It should be noted that the shunt is placed on the negative or ground path of the circuit between the battery and the load. Since the monitor is counting charge flowing in either direction, technically such measurement could be done on the positive side of the circuit. However, since the shunt is not insulated, it would pose a risk of short if this were on the positive pathway in the circuit. The design of this battery monitor and all others is designed to use the negative path (and the sampling voltage is positive with respect to the shunt voltage).
The charger that I have for this particular battery uses a PP45 connector, which the battery also has. I connect the battery to the load using its SB-120 connector. Therefore, if I want to track the charging cycle with the monitor, I need to leave the shunt in the circuit when charging as well. I had to build an SB-120 to PP45 adapter, which lets me disconnect the load and plug the charger in place of the load. This way the battery monitor can count and track the charge cycle as well as the discharge cycle.
I wrapped the shunt with electrical tape and then applied shrink wrap over it to prevent anything coming onto contact with the open ground connector.
Testing
I recently posted a diagram of my power distribution wiring. This setup allows me to switch between mains power and battery backup. It also allows me to switch a battery charger in and out.
I started with a completely discharged battery. This allows the battery monitor to be reset, then monitor the charge going into the battery until completely charged. Then, when completely charged, the battery monitor is then set to indicate full charge. At this point the battery monitor has tracked the amount of charge needed to bring the battery from completely discharged to fully charged. It now can track the percentage of charge remaining as it is being discharged by the load.
Note that this method of calibrating the battery monitor is only one method. The alternative is to set the battery capacity in the battery monitor directly. For example, I could have easily set it to 40 Ah directly.
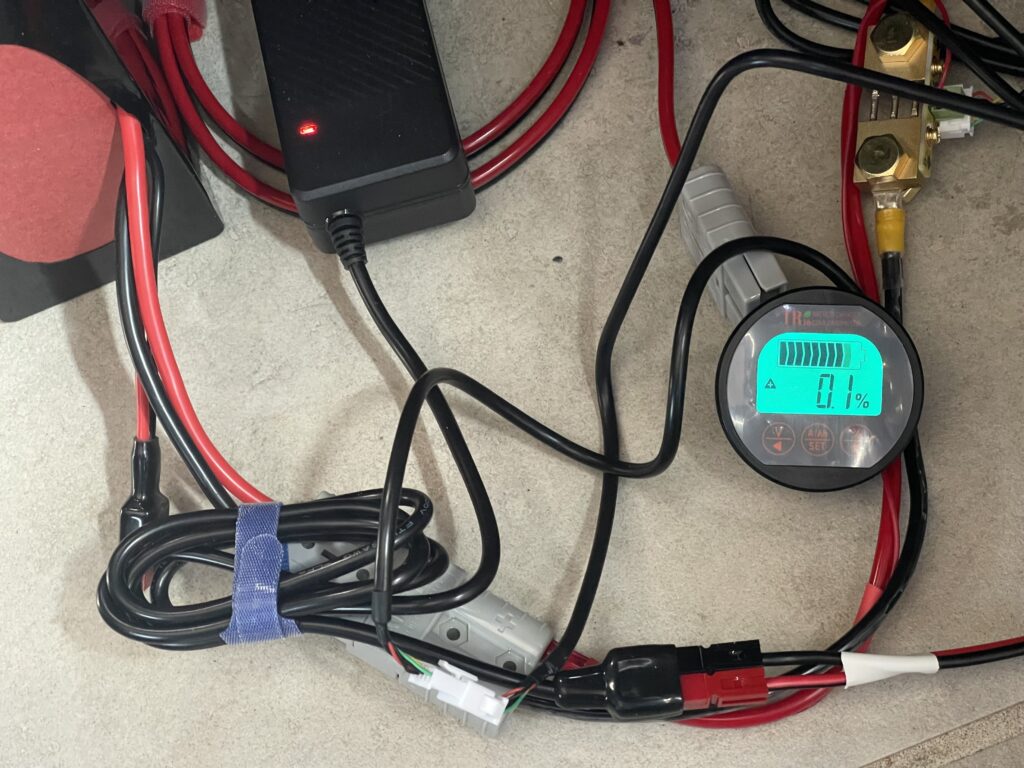
I transferred from mains power to battery with a few rigs powered up and all other devices which I have running on 12 volts. My idle current draw is usually about 1.5 to 2 amps. I watched the battery monitor indicate the percentage of battery charge remaining for about an hour or so, and it was slowly discharging as I would expect.
To test the memory on the battery monitor, I disconnected the shunt cable assembly from the battery so that the battery monitor would lose power. I waited a few minutes and then reconnected the battery, and the percentage remaining resumed where it left off.
If the battery monitor did not have the memory feature, I would need to recalibrate the capacity after a power loss. This normally would not occur unless you discharge the battery completely.
I decided to verify the capacity (Ah) indicated on the battery monitor. Since I charged the battery to full and set the percentage to 100% on the monitor when charging had completed, I checked the amp hour setting in the monitor. Oddly it indicated 100 Ah. I had assumed that it would be closer to 40 Ah, since that’s the capacity of the battery I am testing with. I manually set it to 40 Ah and repeated the discharge/recharge cycle.
I was able to get a full 40 Ah out of the Bioenno battery before the low voltage cutoff in the BMS triggered.
Second Battery Test
I tested a second LiFePO4 battery which is an Eco-Worthy 30 Ah model. I started with a full charge, set the battery monitor to 30 Ah and switched over to battery power to begin the test.
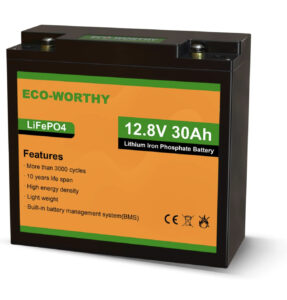
I ran the radios all day using FT8, VARA HF, and FM modes, and the battery held up well. Voltage hovered around 12.8 volts when under a 10 amp load when transmitting.
I was able to get a full 30 Ah out of this battery, and for the price it is quite a bargain. The battery monitor accurately indicated the charge remaining throughout the days use.
Third Battery Test
I tested a Redodo 100 Ah LiFePO4 battery. I started with a full charge and then set the battery meter to 100 Ah. I then ran off battery power for 3 days continuous standby with some transmit activity here and there. The battery monitor accurately measured and indicated the remaining charge both for the discharge and recharge cycles.

Final Thoughts
Imagine not having a battery monitor on your smart phone – you would have to guess how much capacity remains based on usage. Having a battery monitor is a luxury we have on our smart phones and you can add the same for your battery system quite easily.
Having a battery monitor which is fully automatic (after initial reset and setup) is a very helpful addition to my setup. While operating on battery, I can see how much charge is remaining or how far until the battery is fully charged. I did not have to spend very much on the monitor itself. There are many monitors with better displays and more information available on the display. This particular one works as described and does exactly what I was hoping it would do.
Another benefit to a battery monitor is to test the battery’s rated capacity. For example if a battery is rated for 100 amp hours, and you start with a full charge and monitor the drain cycle of the battery, you can verify if it did in fact deliver 100 amp hours. If not, it could indicate a problem with the battery and/or the charging system.
I would recommend at the very least an inexpensive battery monitor if you use a LiFePO4 battery, whether it be portable or at the QTH. They are simple to wire in and can be a useful addition to your battery setup.